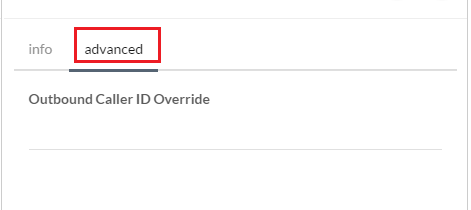
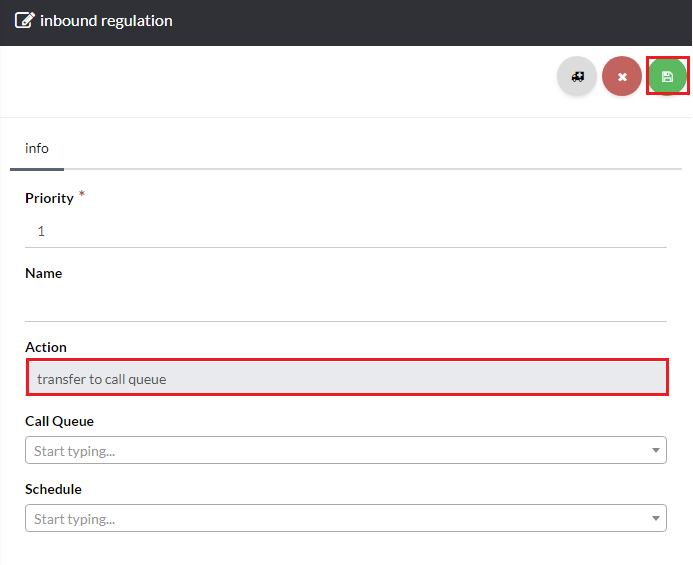
Now, under the Info section enter a descriptive name for your routing rule [su_exhibit text=”3a”]. Under the Advanced section you can override the outbound caller ID for all incoming calls using this routing rule [su_exhibit text=”3b”]. Next, go back to the inbound rule you created and start building your inbound rule regulations [su_exhibit text=”3c”]. Under Action choose Transfer to Call Queue,then select the Call Queue you would like to send the call to [su_exhibit text=”3d”].
Note: Call queue timeouts are set within the call queue menu.
For more information on creating and managing a call queue you can visit the follow article: How to Add a Call Queue
[su_field_description]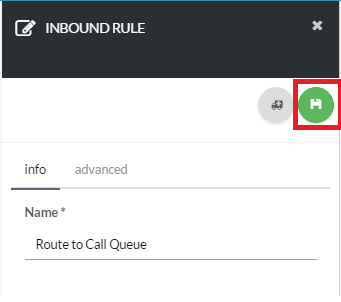
Transfer to Voicemail
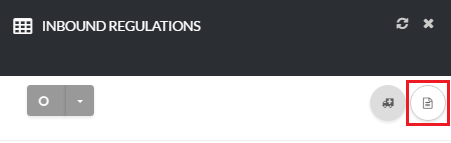
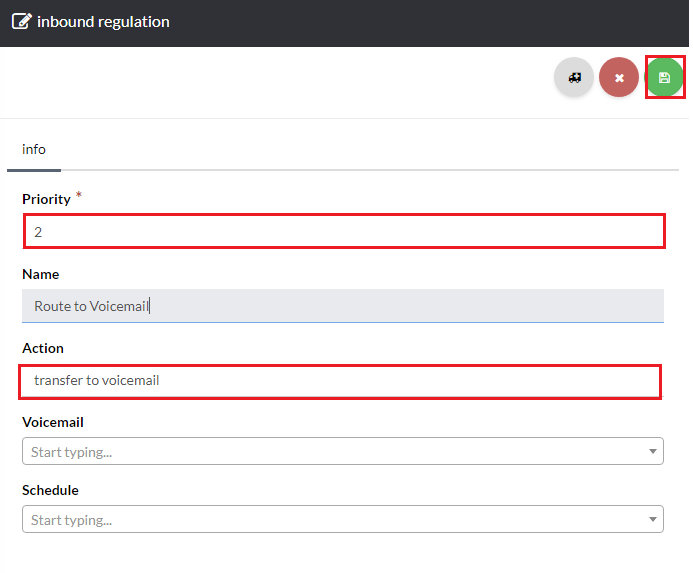
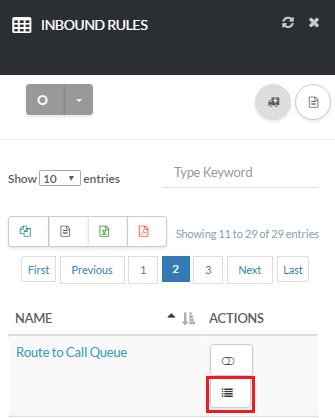
Almost done! Let’s finish up. Now, click the icon under Actions next to your routing rule [su_exhibit text=”4a”]. Next, click the create icon at the top right-hand side of the page as shown in [su_exhibit text=”4b”]. For this inbound rule regulation change the Priorty to 2. For action select Transfer to Voicemail and select the voicemail account to transfer calls to from the drop down box, once you are done click save [su_exhibit text=”4c”].