[su_howto_introduction text=”How to Route Calls to a User”]
[su_howto_steps]
1234
[su_management_portal_login]
[su_inbound_rules]
[su_tab_title text=”Inbound Routing Rule”]
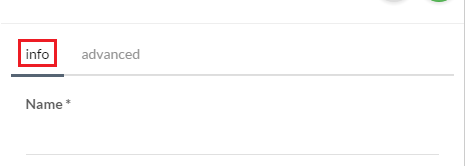
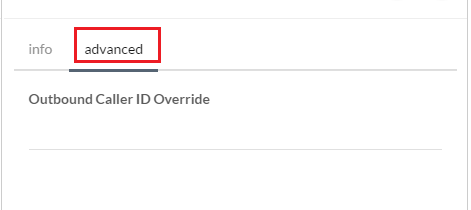
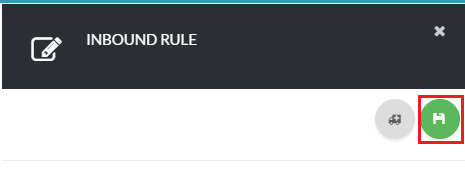
Now, under the Info section enter a descriptive name for your routing rule [su_exhibit text=”3a”]. Next, under the Advanced section you can override the outbound caller ID for all incoming calls using this routing rule [su_exhibit text=”3b”]. Click the save icon on the top right-hand side of the page [su_exhibit text=”3c”].
Note: For the next step you will need to have a user already created. You can view the steps for creating a user in more detail in the following article: How to Create a User
[su_tab_title text=”Transfer to User”]
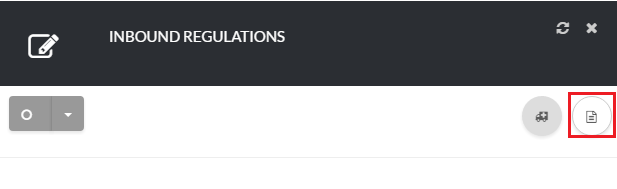
Almost done! Now, it’s time to edit your routing rule. Click the icon under Actions next to your routing rule [su_exhibit text=”4a”]. Next, click the create icon at the top right-hand side of the page [su_exhibit text=”4b”]. Once you have specified all your regulations, click Save to commit your changes [su_exhibit text=”4c”].
For you convenience, a description of each field is provided below.
Priority
This is the way you will order your regulations for this routing rule. If the priority for this regulation is set to 1, then it will be the first regulation that will be executed for this rule.
Name
A descriptive name for your routing rule regulation.
Action
Select Transfer to User.
User
Select the user you want to route calls to.
Schedule
Choose a schedule from the drop down menu.
Timeout
The amount of time in seconds that we should try to connect the call before moving on to the next regulation in the routing rule.