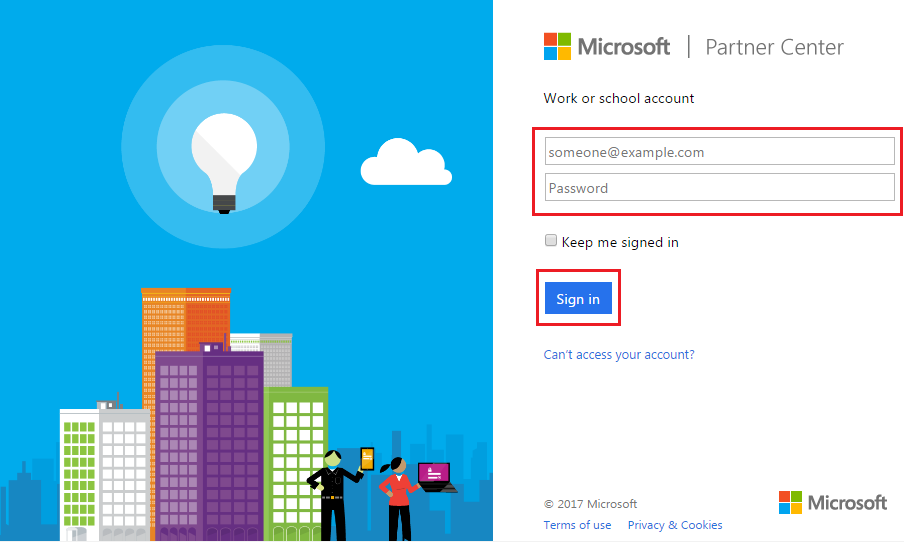
1. Home
  2. Profile
  3. Office 365
  4. How to enable UM in O365

How to enable UM in O365

About

This article demonstrates step-by-step instructions for Enabling UM in O365.

Step-by-Step Instructions

The below table will detail the steps required to accomplish your goals:

12

Login to Office 365

Login to O365 using an admin account, then finally clicking the Sign in button as shown in Exhibit 1.

width="500"
Log into Office 365

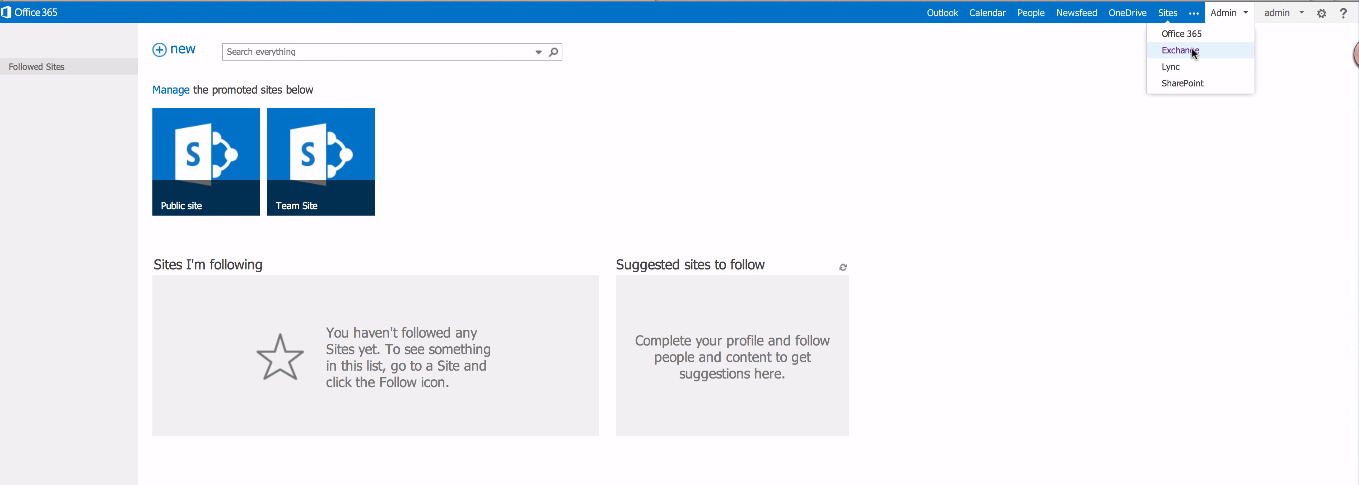
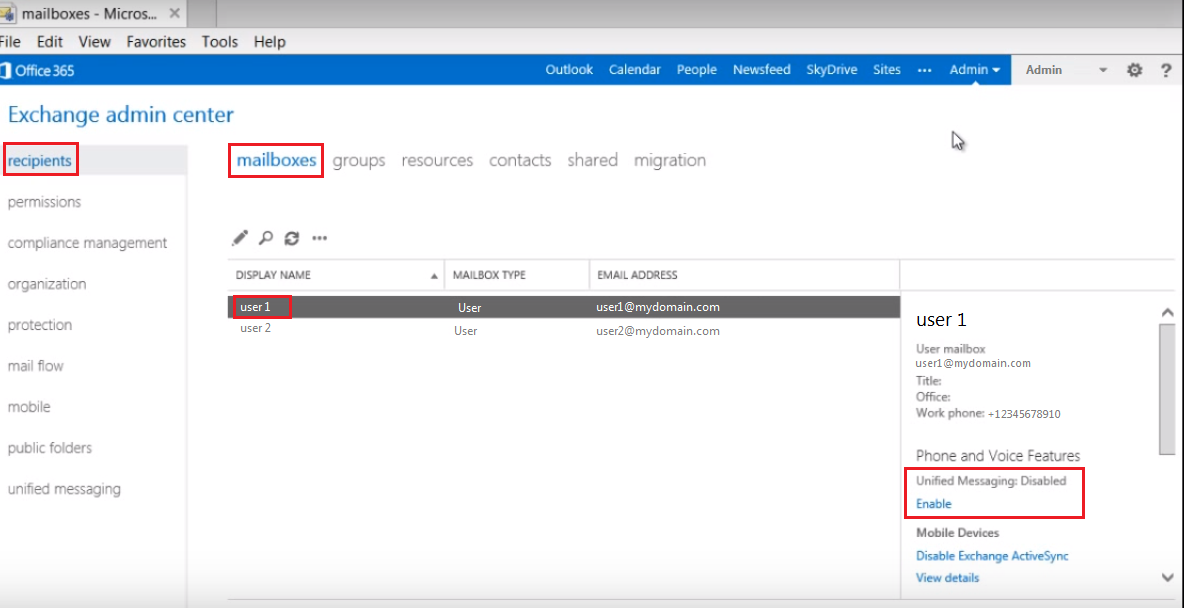
Go to the Exchange Admin Center

Now, go to Admin located on the upper right-hand side of the page, and click on Exchange from the drop down menu as shown in Exhibit 2a. On the Exchange Admin Center, click on recipients, and under mailboxes, choose a user, then on the third column, look for Unified Messaging and click on enable as shown in Exhibit 2b.

 Navigate to Conference Attendant
Navigate to the Exchange Admin Center
 Navigate to Conference Attendant
Click on Enable Unified Messaging

Conclusion

Congratulations! You have now completed the "How-To Enable UM in O365" article and we hope that you have accomplished the goals you set out to achieve. However, if for any reason you may still require assistance with setup, simply login to the Management Portal and submit a support request.


print
Updated on February 2, 2018

Was this article helpful?

Related Articles