About
This article demonstrates step-by-step instructions for setting up Fusion PBX SIP Trunking with Circuit ID.Step-by-Step Instructions
The below table will detail the steps required to accomplish your goals:12345
Login
Login to the Management Portal by clicking a sign-on provider or entering your Email Address and Password as shown in Exhibit 1. If you don't have an account, you can sign signup instantly by clicking here.
Add your Fusion PBX Server(s) to Circuit ID
Follow the How to Add your Server(s) to Circuit ID guide
Purchase Phone Numbers
Follow the How to Purchase Phone Numbers guide to purchase one (1) or more numbers.
Add a New Gateway to Fusion PBX
- Login to Fusion PBX admin panel
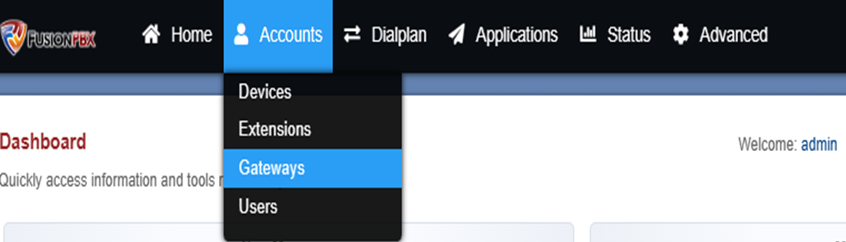
- Go to the Gateways tab under the Accounts tab as shown in Exhibit 1.
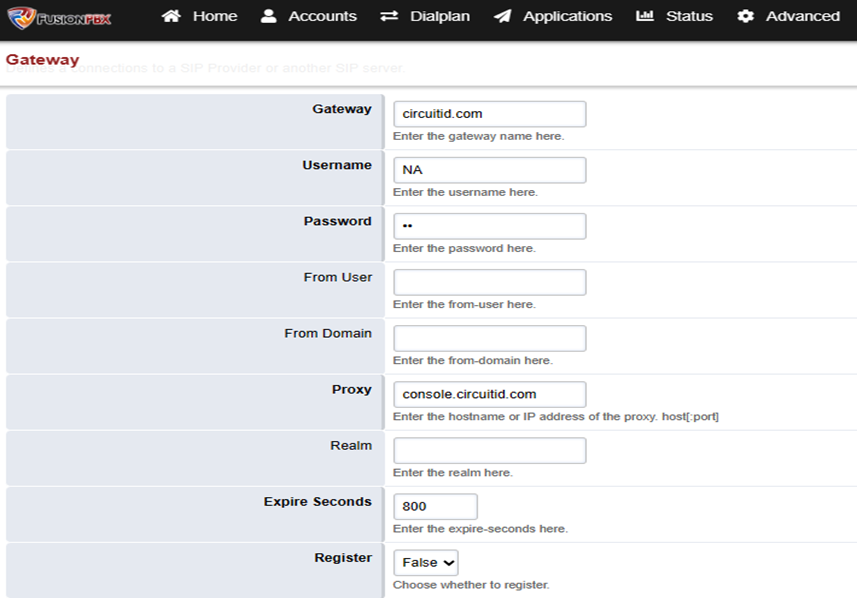
- Click on the Add button to add new Gateway and enter the following information as shown in Exhibit 2:
- Gateway: Enter “Circuit ID” or a descriptive name.
- Username: NA
- Password: NA
- Proxy : g.pstn.circuitid.com (or use a Localized Termination URIs as shown in Exhibit 3)
- Register: False
- Hit Save button on top right corner
Localized Termination URIs
| Region | Hostname |
| US East (Virginia) | useast.pstn.circuitid.com |
| US East 2 (Ohio) | useast2.pstn.circuitid.com |
| US West (California) | uswest.pstn.circuitid.com |
| EU (Ireland) | euwest.pstn.circuitid.com |
| Asia Pacific (Singapore) | apsoutheast.pstn.circuitid.com |
Signalling IPs
| Region | IPv4 | IPv6 |
| US East (Virginia) | 107.21.33.49 | 2600:1f18:61b0:cb00:1ee:5287:d76a:2759 |
| US East (Ohio) | 18.220.12.219 | 2600:1f16:580:e00:7776:eb3e:433c:160c |
| US West (California) | 54.183.58.228 | 2600:1f1c:1b2:8000:18c3:9b13:bbf9:1bcf |
| EU (Ireland) | 54.194.37.26 | 2a05:d018:a09:fd00:8c56:bdfd:40bf:1b8d |
| Asia Pacific (Singapore) | 52.77.98.128 | 2406:da18:b5f:3800:7610:fe37:13e1:8228 |
Media IPs
| Region | IPv4 | IPv6 |
| US East (Virginia) | 107.21.35.184 | 2600:1f18:61b0:cb00:6cc6:e72b:bd5f:21b4 |
| US East (Virginia) | 54.88.36.220 | 2600:1f18:61b0:cb00:558d:2cc:6b92:890a |
| US East (Virginia) | 34.230.206.69 | 2600:1f18:61b0:cb00:4f9b:55ca:686:4f04 |
| US East 2 (Ohio) | 13.59.21.165 | 2600:1f16:580:e00:861d:b45c:1fc2:4b70 |
| US West (California) | 54.193.34.84 | 2600:1f1c:1b2:8000:76e7:a21d:89af:d836 |
| US West (California) | 54.193.16.227 | 2600:1f1c:1b2:8000:1b5b:7227:cac0:45e5 |
| EU (Ireland) | 52.49.91.117 | 2a05:d018:a09:fd00:c16b:fb2d:35f5:7a0a |
| Asia Pacific (Singapore) | 52.74.94.83 | 2406:da18:b5f:3800:549e:abbf:2e45:b283 |
Configure Inbound Routes for Inbound Calls
- Login to Fusion PBX and go to Destination under Dial Plan tab as shown in Exhibit 1.
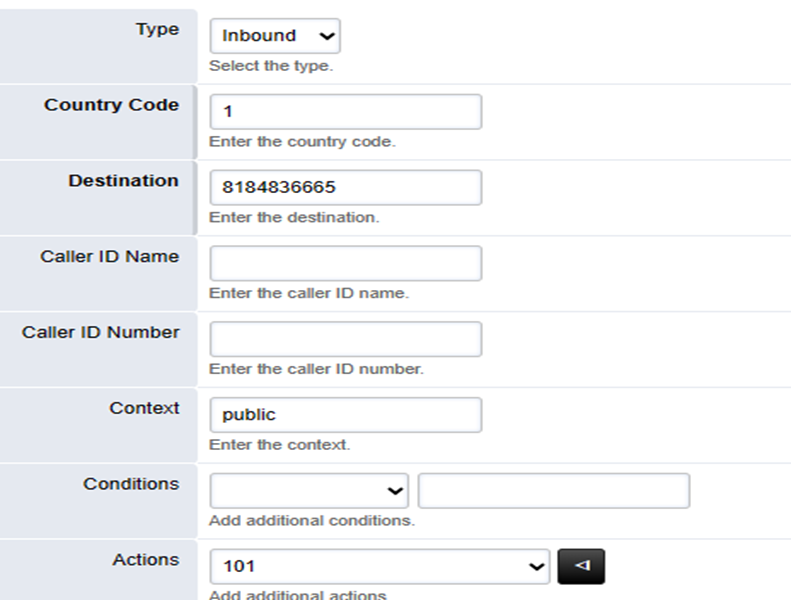
- Click the Add button on the top-right corner of the screen and enter the following as shown in Exhibit 2:
- Type: Inbound
- Country Code: 1 for USA
- Phone Number: The phone number you selected in Step 3
- Action: Select the target you would like to route the number to.