1. Home
  2. Dashboard
  3. How to Create A Task

How to Create A Task

About

This article demonstrates step-by-step instructions for How to Create A Task.

Step-by-Step Instructions

The below table will detail the steps required to accomplish your goals:

123

Login

Login to the Management Portal by clicking a sign-on provider or entering your Email Address and Password as shown in Exhibit 1. If you don't have an account, you can sign signup instantly by clicking here.
Management Portal Login Form

From the Dashboard click Project as shown in Exhibit 2a. Next, in the Task section click New as shown in Exhibit 2b.

Select Projects
New Task

Create New Task

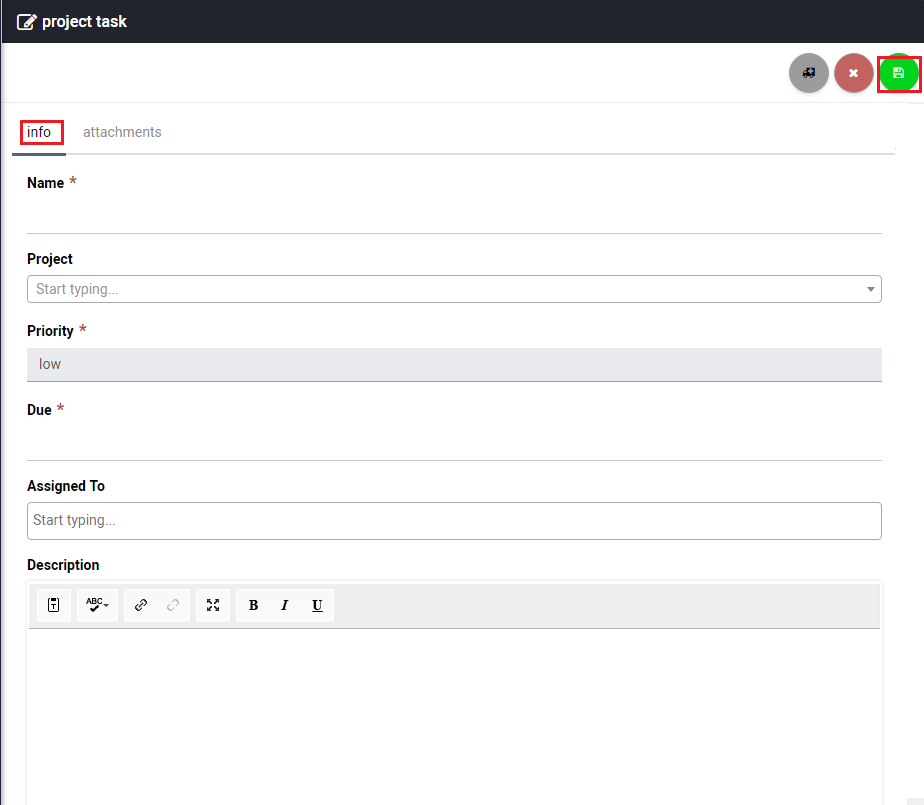
Almost done! Now, it’s time to create your task. Enter the information in the required fields for the Info section as shown in Exhibit 3a, you can also attach files in the Attachment section as shown in Exhibit 3b. Once you are done click save.

For you convenience, a description of each field is provided below.

Info

Name
Enter a descriptive name for your task.
Project
Select the project this task is for from the drop down menu.
Priority
From the drop down menu select the priority of the task. You can select Low,Medium, or High.
Due
Select the date you would like to have the projected completed by.
Assigned To
Select the person the task will be assigned to.).
Description
Enter a description of the task.

Attachments

Attachments
You can attach files by dragging and dropping or by clicking to upload.
Task Info
Attach Files

Conclusion

Congratulations! You have now completed the "How-To Create A Task" article and we hope that you have accomplished the goals you set out to achieve. However, if for any reason you may still require assistance with setup, simply login to the Management Portal and submit a support request.


print
Updated on November 12, 2018

Was this article helpful?

Related Articles