[su_howto_introduction text=”How to Create A Project”]
[su_howto_steps]
123
[su_management_portal_login]
Navigate to Projects
[su_dashboard_tabs content=”Projects”]
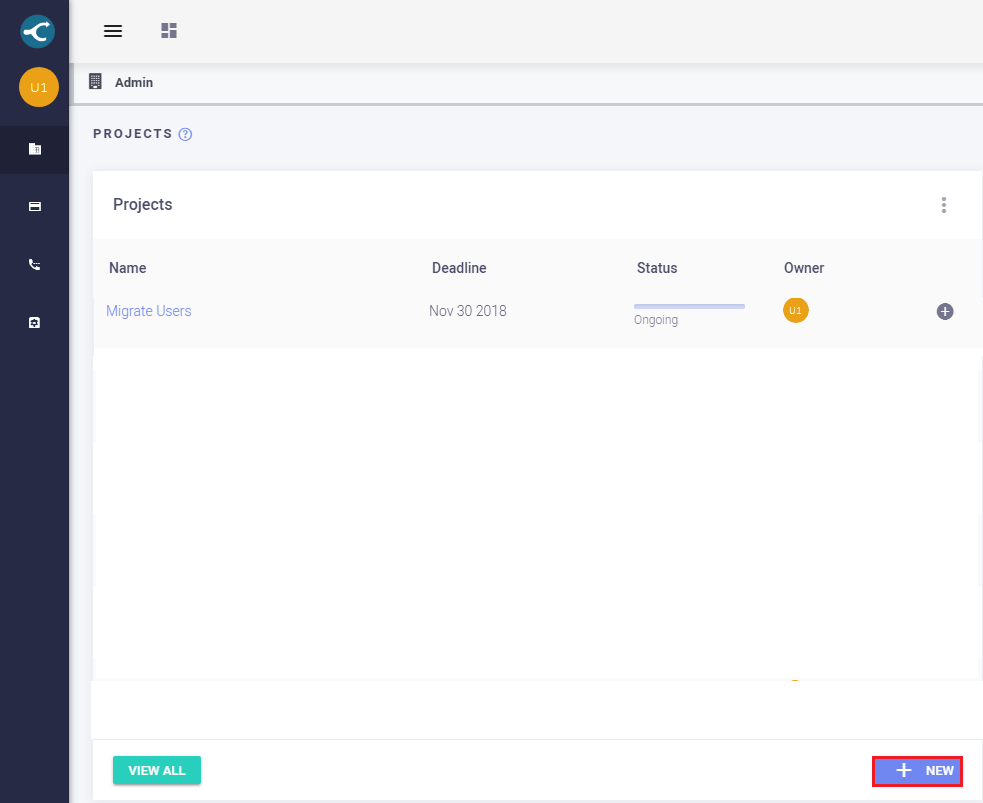
Next, click
New to create a project [su_exhibit text=”2b”].
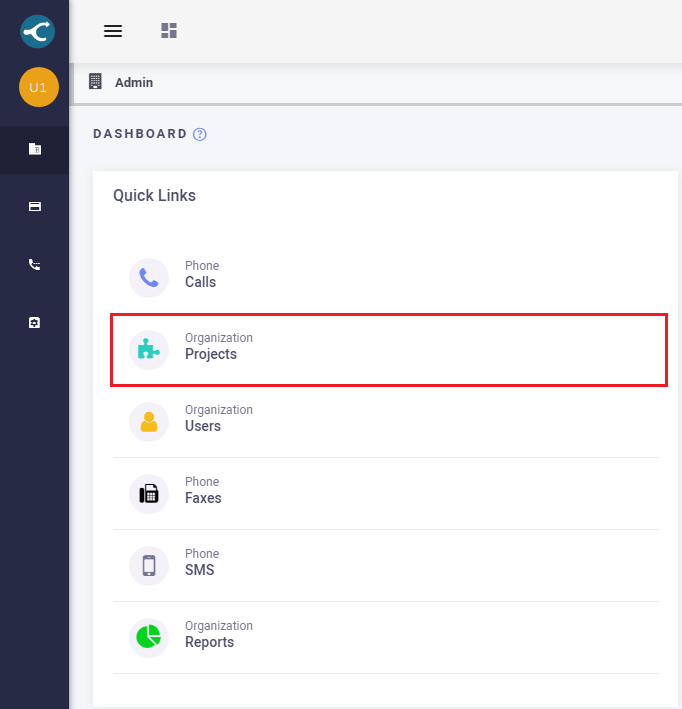 Select Projects
 New Project
Create New Project
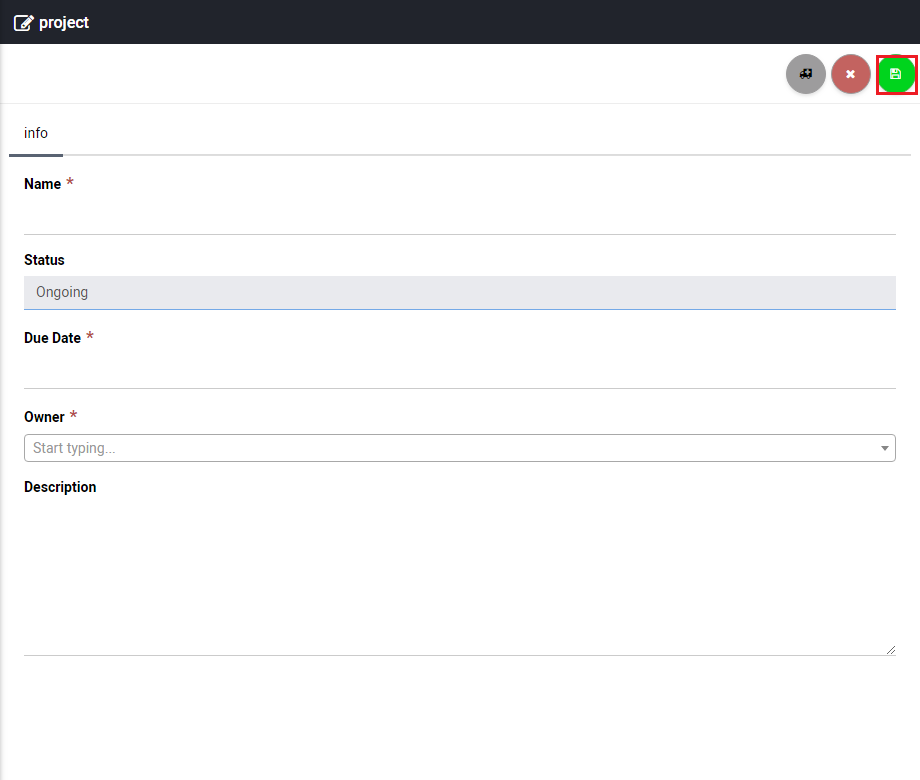
Almost done! Now, it’s time to create your project. Enter the information in the required fields [su_exhibit text=”3″]. Once you are done click save.
For you convenience, a description of each field is provided below.
Name
Enter a descriptive name for your project.
Status
From the drop down menu select the status of the project. You can select Ongoing,On-Hold,Pending Approval, or Completed.
Due Date
Select the date you would like to have the projected completed by.
Owner
Select the person responsible for the project.).
Description
Enter a description of the project.
 Create Project
[su_howto_conclusion text=”Create A Project”]


