This article demonstrates step-by-step instructions for How-To Create a Group .
Product Features
Call Groups
Create, organize and manage users according to location, department, scope of support etc. to ensure inbound calls are directed to the most appropriate team.
Device Load Balancing Groups
Balance calls between different devices, queues, or call groups.
IP Whitelist Groups
Whitelist specific IPs to access your services without having to worry about their access getting blocked.
Granular Security Groups
Limit the access of agents to your organization’s portal. This is useful if you have agents who only need access to billing pages.
Step-by-Step Instructions
The below table will detail the steps required to accomplish your goals:
1234
Login
Login to the Management Portal by clicking a sign-on provider or entering your Email Address and Password as shown in Exhibit 1. If you don't have an account, you can sign signup instantly by clicking here.
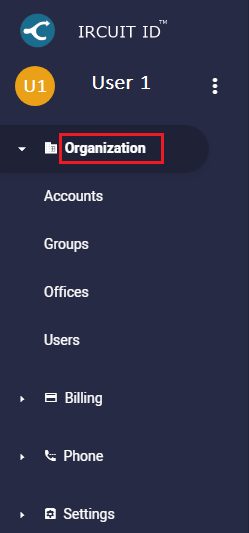
Now, navigate to Organization >Groups as shown in Exhibit 2a. Next click the create icon on the top right-hand side of the page as shown in Exhibit 2b.
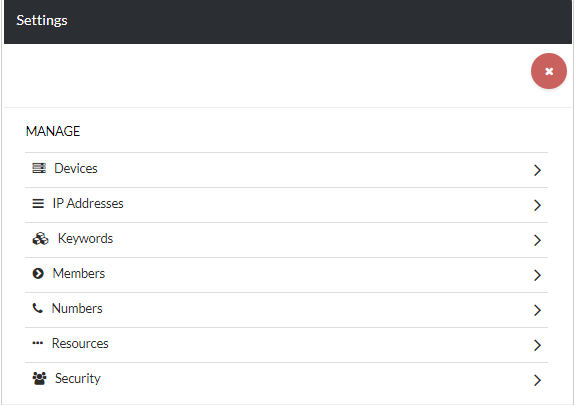
Next, click the gear icon located under Actions next to your group as shown in Exhibit 4a. Now, you can start managing your group by selecting one of the Settings as shown in Exhibit 4b.
For your convenience, a description of each field is given below:
Manage
Devices
Select the devices you want to add to your group.
IP Addresses
Select the IP Addresses you want to add to your group.
Keywords
Add the keywords you want to use when you setup keyword call monitoring.
Members
Select the members you want to add to your group.
Numbers
The phone numbers that will be used for the group.
Resources
Choose the resources you want to use for your group.
Security
Choose what pages you would like this group to have access to.
Congratulations! You have now completed the "How-To Create a Group" article and we hope that you have accomplished the goals you set out to achieve. However, if for any reason you may still require assistance with setup, simply login to the Management Portal and submit a support request.