This article demonstrates step-by-step instructions for How to Create and Setup a Outbound Normalization .
Step-by-Step Instructions
The below table will detail the steps required to accomplish your goals:
1234
Login
Login to the Management Portal by clicking a sign-on provider or entering your Email Address and Password as shown in Exhibit 1. If you don't have an account, you can sign signup instantly by clicking here.
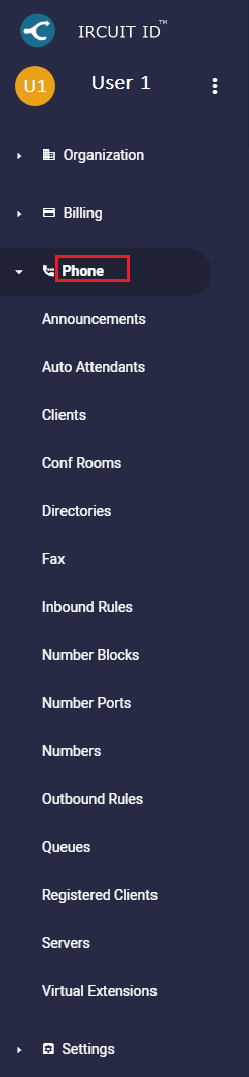
Now, navigate to Phone >Outbound Normalization as shown in Exhibit 2a. Next click the create icon on the top right-hand side of the page as shown in Exhibit 2b.
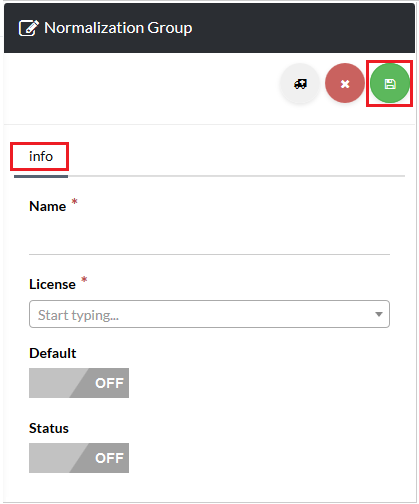
Now, create your outbound normalization group by completing the required fields and clicking the save icon on the top right-hand side of the page as shown in Exhibit 3.
For your convenience, a description of each field is given below:
Name
Enter a descriptive name for your outbound normalization group.
License
Choose a license from the drop down menu.
Default
Click “On” to make this your default group
Status
Turn status On to enable the normalization group. When Off, this group will be disabled.
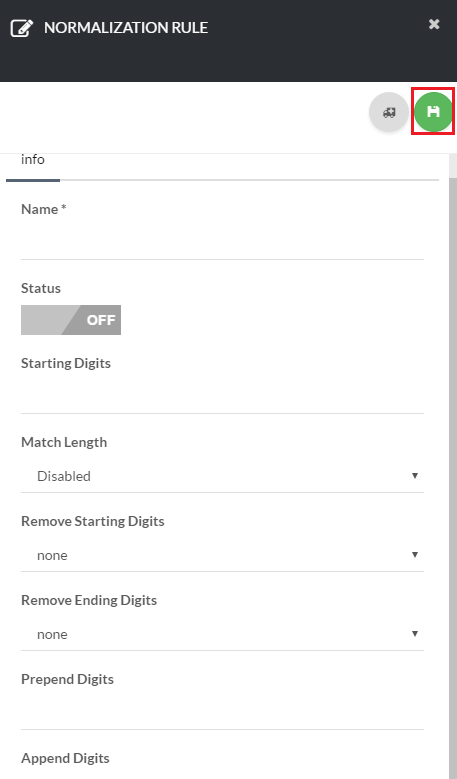
Next, click on the icon under Actions next to your normalization group as shown in Exhibit 4a and click the create icon on the top right-hand side of the page to create your rules as shown in Exhibit 4b. Then, complete the required fields and click the save icon on the top right-hand side of the page as shown in Exhibit 4c.
For your convenience, a description of each field is given below:
Name
Enter a descriptive name for your normalization rules.
Status
Turn status On to enable the normalization group. When Off, this rule will be disabled.
Starting Digits
Enter the prefix
Match Length
This field lets you determine the amount of digits you would like the normalization rule to read.
Disable: Leave as disable if you do not want to match any length of digits
At least: Will match at minimum the amount of digits that you select
Exactly: Will match the exact number of digits that you select
Remove Starting Digits
Select how many digits you would like removed from the beginning of the dialed number.
Remove Ending Digits
Select how many digits you would like removed from the end of the dialed number.
Prepend Digits
Enter the digits you would like to prepend to the beginning of the dialed number.
Append Digits
Enter the digits you would like to append to the end of the dialed number.
Congratulations! You have now completed the "How-To Create a Outbound Normalization " article and we hope that you have accomplished the goals you set out to achieve. However, if for any reason you may still require assistance with setup, simply login to the Management Portal and submit a support request.