1. Home
  2. Settings
  3. IP Whitelists
  4. How to Create an IP Whitelist

How to Create an IP Whitelist

About

This article demonstrates step-by-step instructions for Create an IP Whitelist.


Step-by-Step Instructions

The below table will detail the steps required to accomplish your goals:

1234

Login

Login to the Management Portal by clicking a sign-on provider or entering your Email Address and Password as shown in Exhibit 1. If you don't have an account, you can sign signup instantly by clicking here.
Management Portal Login Form

Add an IP Address to a Group
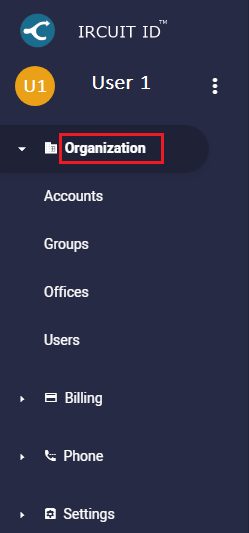
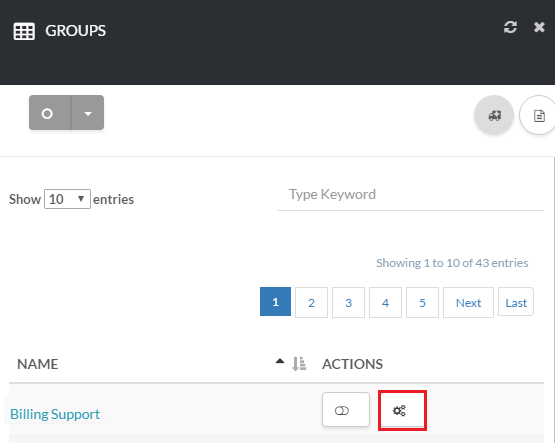
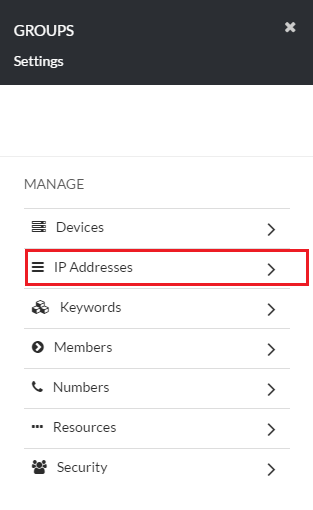
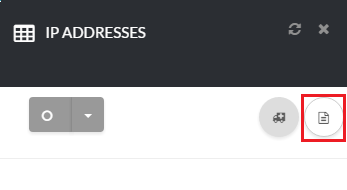
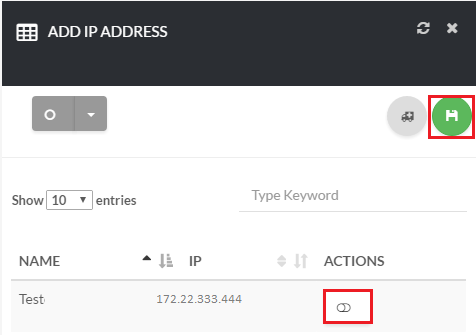
Navigate to Organization > Groups as shown in Exhibit 2a and click the gear icon under Actions as shown in Exhibit 2b. Select IP Addresses as shown in Exhibit 2c. Next, click the New icon on the top right-hand side of the page as shown in Exhibit 2d. Under Actions, click the switch button to select the items, and click Save as shown in Exhibit 2e.

For this step you will need to have a group already created. You can view the steps for creating a new Group in more detail in the following article: How to Create a Group
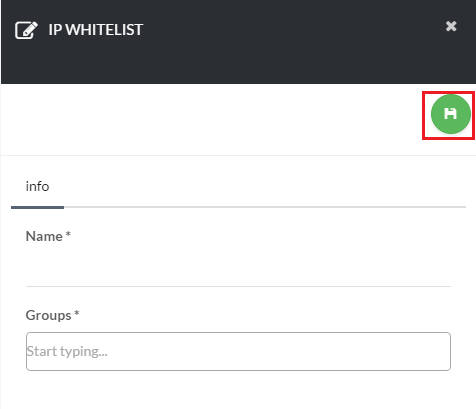
Phone directory tab
Navigate to Organization
Phone directory tab
Gear Icon
Phone directory tab
Select IP Addresses Tab
Add a phone directory
New Group IP Address
Add a phone directory
Add IP Address
Now, navigate to Settings >IP Whitelists as shown in Exhibit 2a. Next click the create icon on the top right-hand side of the page as shown in Exhibit 2b.
Phone directory tab
Navigate to Settings
 Fill out Details
Create New IP Whitelists

Save IP Whitelist

Now, enter a descriptive name for your ip whitelist, next enter a group and click save as shown in Exhibit 4

Note: The Hits column display the count of network traffic connections that was allowed to transmit traffic with the Circuit ID system, which would have otherwise been blocked had this resource not been created.

Phone directory tab
Setup IP Whitelist

Conclusion

Congratulations! You have now completed the "How-To How to Create an IP Whitelist" article and we hope that you have accomplished the goals you set out to achieve. However, if for any reason you may still require assistance with setup, simply login to the Management Portal and submit a support request.


print
Updated on November 16, 2018

Was this article helpful?

Related Articles