About
This article demonstrates step-by-step instructions for How-To Purchase Local Numbers.Product Features
Step-by-Step Instructions
The below table will detail the steps required to accomplish your goals:Login
Login to the Management Portal by clicking a sign-on provider or entering your Email Address and Password as shown in Exhibit 1. If you don't have an account, you can sign signup instantly by clicking here.
Navigate to Numbers
Now, navigate to Phone >Numbers as shown in Exhibit 2a. Next click the create icon on the top right-hand side of the page as shown in Exhibit 2b.


Select Local Numbers
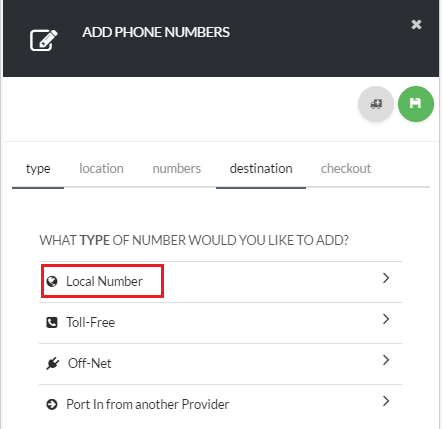
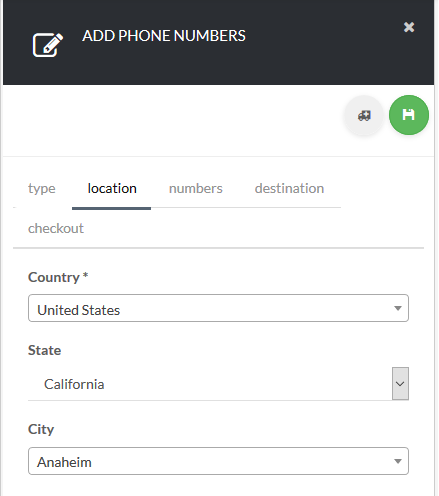
Next, click Local as shown in Exhibit 3a. Then, select the Location (Country, State & City) as shown in Exhibit 3b.
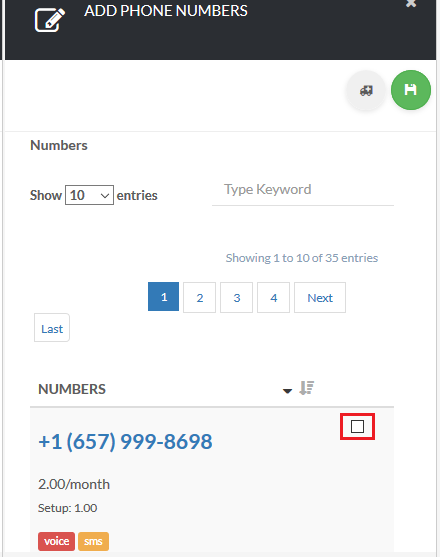
Based on your selection, you will be presented with numbers available in that area. Tick the check-box to the right-hand side of the DID you would like to purchase as shown in Exhibit 3c then click the green save button on the top right-hand side of the page to proceed to the number destination page.
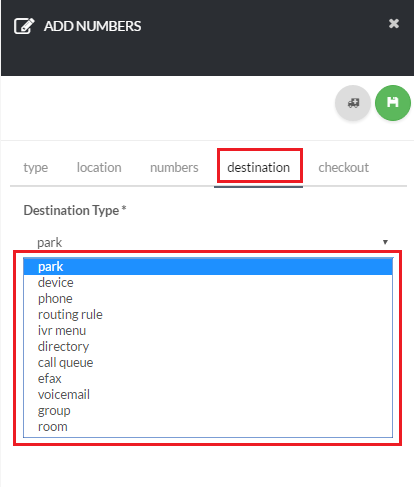
Choose a destination for your new numbers as shown in Exhibit 3d. Note, that the destination is not permanent and can always be changed in the numbers page.


Summary
You are almost done!
Lastly, select the preferred Payment Method you would like to use to complete your purchase as shown in Exhibit 4 . After you click the save button on the top right-hand side of the page, your order is completed and your new numbers are now ready for use!


