This article demonstrates step-by-step instructions for How To Bring Your Own SIP number.
Product Features
Bring Your Own Phone Numbers
Tired of the lengthy process of porting numbers out? With CircuitID’s Bring Your Own SIP, you don’t need to port your numbers! Simply configure them to point to CircuitID’s gateways. Porting problems, now resolved!
Bring Your Own Outbound
Use your existing outbound termination routes and you can even use the existing carrier you have. No need to worry about IP-based address authentication and use any cloud infrastructure with your outbound routes.
Bring Your Own Infrastructure
Migrating your business’ established communication infrastructure can be costly and takes time. With CircuitID’s Bring Your Own SIP, you can use your existing configuration and setup.
Bring Your Own Carrier
Still under contract with another carrier? No problem! Use your existing carrier you are still under contract with or use another one while using CircuitID’s infrastructure. Leverage this feature to get the biggest cost advantage and favorable deal.
Step-by-Step Instructions
The below table will detail the steps required to accomplish your goals:
1234
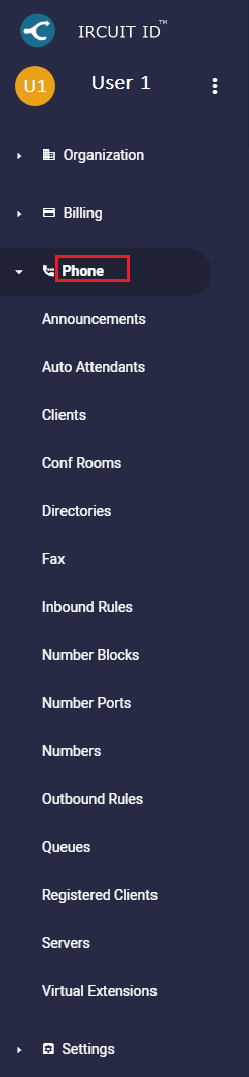
Login
Login to the Management Portal by clicking a sign-on provider or entering your Email Address and Password as shown in Exhibit 1. If you don't have an account, you can sign signup instantly by clicking here.
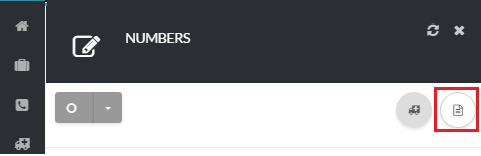
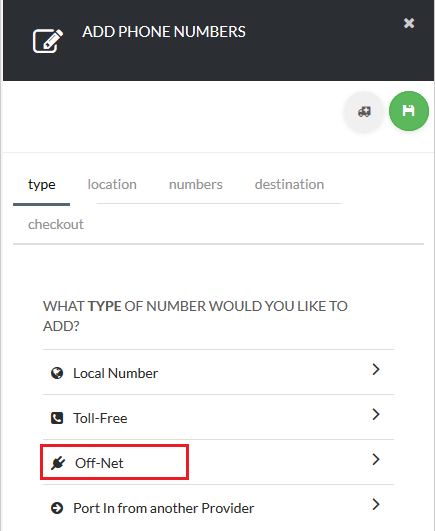
Next, click Off-Net as shown in Exhibit 3a and enter the phone number(s) you would like to add. Then, click the add button as shown in Exhibit 3b to continue.
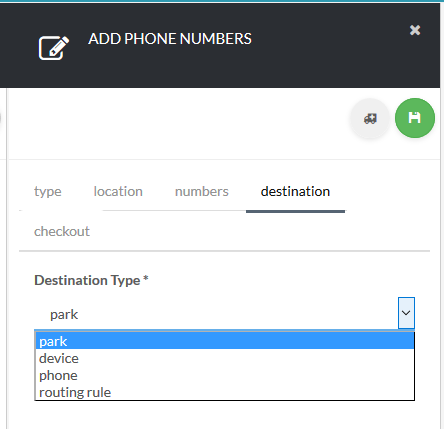
Now that your numbers have been added, select a destination and assign your DID a destination as shown in Exhibit 3c.
Note, that the destination is not permanent and can always be changed in the numbers page.
Note: Ensure you add the ‘1’ to your number so the system will properly format your DID
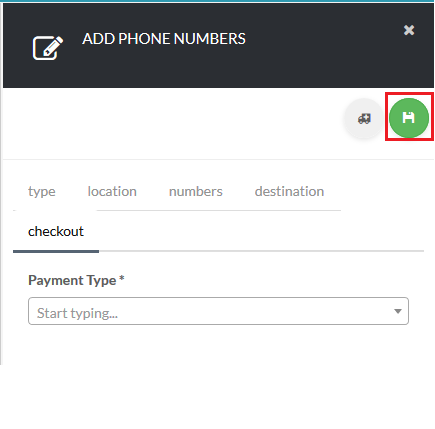
Lastly, select the preferred Payment Method you would like to use to complete your purchase as shown in Exhibit 4 . After you click the save button on the top right-hand side of the page, your order is completed and your new numbers are now ready for use!
Congratulations! You have now completed the "How-To How To Add SIP Access Numbers" article and we hope that you have accomplished the goals you set out to achieve. However, if for any reason you may still require assistance with setup, simply login to the Management Portal and submit a support request.